Hello Everyone, In this tutorial we will discuss how to build your webapp using Python’s one of the most famous web framework Django. Step by step we will learn about installing Django, creating your first app, creating views, forms and models and integrating all these components to render a complete website. Before driving deep lets have a quick glimpse on Introduction.
DJANGO
Python is an all purpose high level programming language. When we say all purpose it includes anything and everything. Include building apps. For building desktop apps we have Tkinter, pyQt, PySide etc. And when it comes to web Apps the first thing that comes to our mind is Django with silent D. Django is a python Web framework specially meant for designing web apps. Even though there are many frameworks such as flask, cherry py, Web2py etc The advantage of Django is that it facilitates fast, clean and hassle free platform for designing the webapps. Further information can be found in python official website. https://www.djangoproject.com/start/
DJANGO INSTALLATION GUIDE
First set the Python’s path in the command prompt
C:\Users\Ummesalma>set path=C:\Python36
It is a best practice to always create your folders and files anywhere other than in your C drive.
C:\Users\Ummesalma>F:
Create a folder called Django_Demo
F:\>mkdir Django_Demo
F:\>cd Django_Demo
Creating Virtual Environment
Virtualenv: Before installing Django, it’s recommended to install Virtual environment because it creates a new virtual space isolates your Python files and softwares from other projects. This will also ensure that any changes made to your current project won’t affect other projects/websites you’re developing.
Create a virtual environment so that if at all you need to update any of the packages it won’t disturb your other projects.
The syntax used for creating a virtual environment in python is very simple.
python –m venv
Here, venv is a keyword.
F:\Django_Demo>python -m venv MYENV
After creating a virtual environment, it is important to activate it then only we can use it.
F:\Django_Demo>MYENV\Scripts\activate
Once the virtual environment is activated you can observe your given environment before the command prompt.
Installing Django
(MYENV) F:\Django_Demo>pip install django
Note: pip is used in python for installation. If the new version of pip is available, you will be shown a message regarding this and recommend you to update pip. If you want to update pip then use the following command.
python -m pip install –upgrade pip
You can check the version of your Django by giving
python –m django –-version
IT IS THE TIME TO CREATE YOUR 1st DJANGO PROJECT
In order to create a project you need to give the following command
(MYENV) F:\Django_Demo>django-admin startproject project_Hello
Go to project. Inside the project you will find manage.py file which is our master file for our further actions. Along with it a folder with the same name as that of the project name will be found (here project_Hello). Inside this folder we have 5 core files named __init__.py, asgi.py, wsgi.py, urls.py and settings.py
__init__.py (which acts as a constructor), asgi.py and wsgi.py files are there for providing the compatibility between web servers, frameworks, and applications. urls.py is used for managing the URLs. And settings.py is a core file in Django projects. It holds all the configuration values that your web app needs to work. The settings may be related to login setting, database settings and many more.
In order to make the project executable we need to migrate into the project environment where all the required files, folders and databases are auto created. In order to migrate into project environment one should give the following code:
(MYENV) F:\Django_Demo>django-admin startproject project_Hello
(MYENV) F:\Django_Demo>cd project_Hello
(MYENV) F:\Django_Demo\project_Hello>python manage.py migrate
Now run the server to check migration has happened successfully
(MYENV) F:\00Django\project_Hello>python manage.py runserver
Once you migrate into the working environment and server is running properly it is required to authenticate the credentials. i.e. you need to provide username, password and email_id details. Since it is your project you will be the super user thus give the following command to authenticate superuser. Before that press Ctrl+c to come back to (MYENV) F:\Django_Demo\project_Hello> path.
Inside the project directory, create a new app:
python manage.py startapp hello_app
Then, add hello_app to the INSTALLED_APPS in project_hello/settings.py:
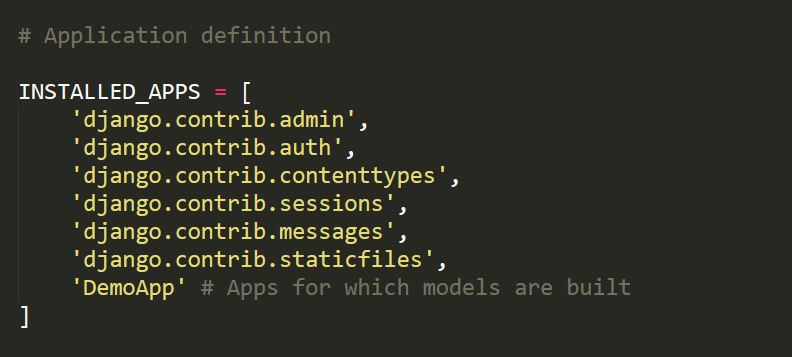
INSTALLED_APPS = [
‘django.contrib.admin’,
‘django.contrib.auth’,
‘django.contrib.contenttypes’,
‘django.contrib.sessions’,
‘django.contrib.messages’,
‘django.contrib.staticfiles’,
‘hello_app’, # Add this line
]
Open hello_app/views.py and add:
from django.http import HttpResponse
def function_hello_world(request):
return HttpResponse(“Hello, World!”)
Open hello_app/urls.py (create it if it doesn’t exist) and add:
from django.urls import path
from .views import function_hello_world
urlpatterns = [
path(“”, function_hello_world), # Maps the root URL to the hello_world view
]
Then, include this in project_hello/urls.py:
from django.contrib import admin
from django.urls import path, include
urlpatterns = [
path(‘admin/’, admin.site.urls),
path(“”, include(‘hello_app.urls’)), # Include myapp URLs
]
RUN THE DJANGO SERVER
python manage.py runserver
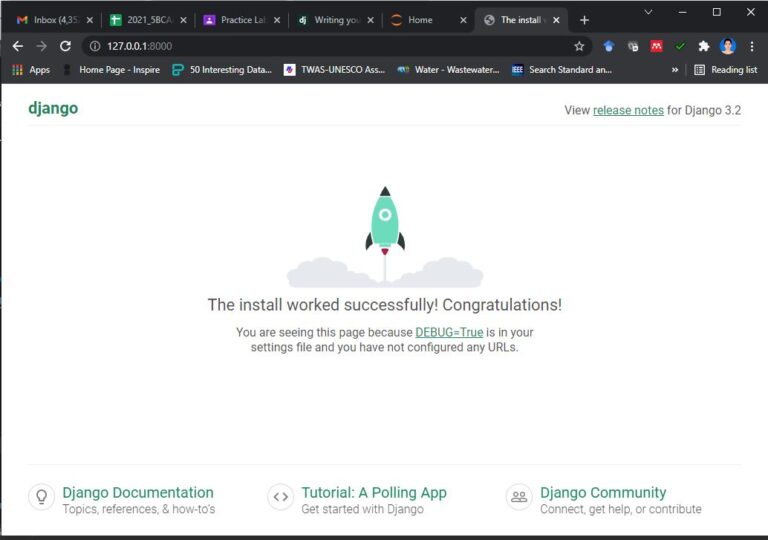
Now, open http://127.0.0.1:8000/ in a browser. You should see “Hello, World!” displayed.
(MYENV) F:\ Django_Demo \ project _Hello>python manage.py createsuperuser
Username (leave blank to use ‘ummesalma’):
Email address: [email protected]
Password: ********
Password (again): ********
Superuser created successfully.
Once the super user is created run the server again
(MYENV) F:\Django_Demo\project_Hello>python manage.py runserver
And successfully go to your web browser and check the starting page.
Type server address 127.0.0.1:8000
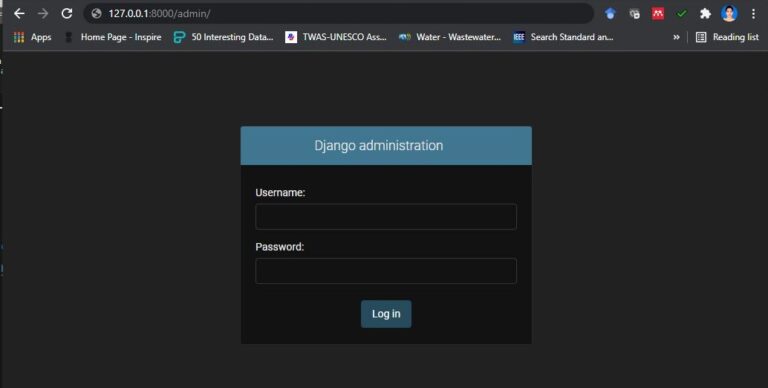
To confirm the admin credentials type 127.0.0.1:8000/admin
You will be asked to confirm the username and password. And you are done with your empty project creation and ready to go for building your 1st app.
BUILDING THE 1st APP INSIDE THE PROJECT
Open any editor (here I am using sublime as it provides side panel for viewing the contents of the folder.)
Drag and drop the project into the sublime. While dragging you should remember that the project (here project_Hello) in your drive from where you are dragging should be at the same level as that of your virtual environment.
Now press control+break or control+c in your cmd prompt and type
(MYENV) F:\Django_Demo\project_Hello>python manage.py startapp DemoApp
Go to sublime you can see that a folder called DemoApp is created. Click on DemoApp folder. You can observe some prebuild files which include admin.py, apps.py, models.py, tests.py and view.py.
Every time when you open the cmd prompt and you are working with the existing project then the environment in which your project is residing should be activated by typing /Scripts/activate.
Step0: Go to the folder where the Django is installed, virtual environment is created.
>cd F:/Django_Demo
Step1: Activate your virtual environment
Eg: MYENV/Scripts/activate
(MYENV) F:\Django_Demo> cd project_Hello
Step3: Go to app folder (Here DemoApp folder) and create the Views in views.py
In order to create a model or view go to your app folder which is inside your project folder. It is because model.py file exists only in app folder and the code related to it should be written there itself.
CREATING VIEWS IN DJANGO
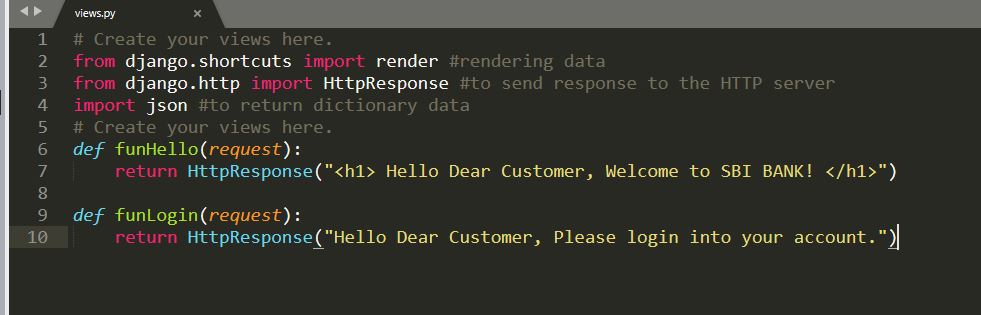
In order to create a user defined function we need to use view.py. For instance let us create a welcome view for the bank customers which can print a welcome message. In order to do this what we need to click on views.py and type the following code.
All the apps, models, pages and forms are to be created inside your environment.
CREATING MODELS IN DJANGO
Step4: Write the code for creating models in models.py file
What is a model?
A model is a visual representation of real world entities. In database terminology short it is collection of tables. Thus we need to write the code to create the tables. In Django model is always an object oriented model. Thus it is written using class concept.
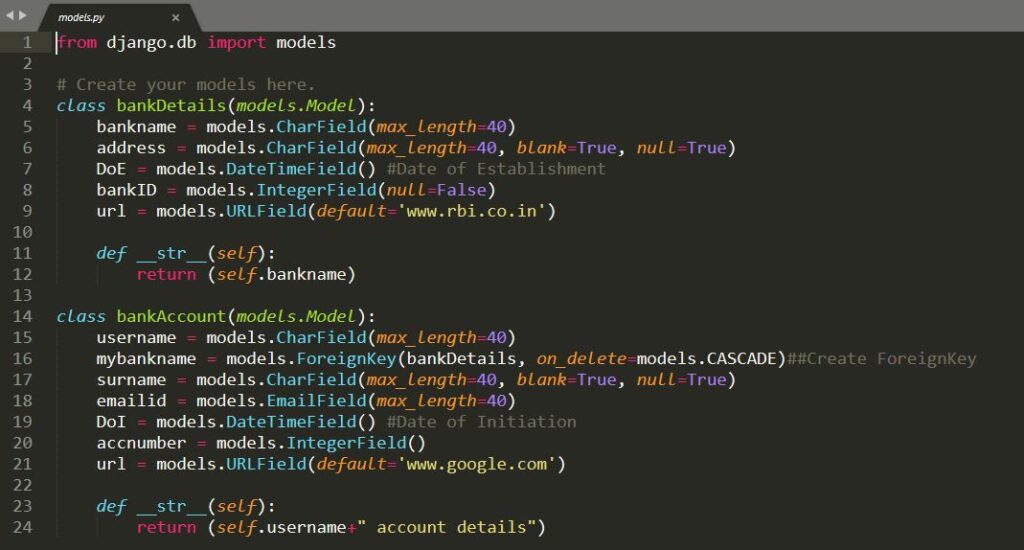
Open models.py file present in your app (Here DemoApp) folder and write a code for creating model.
In the following code parent child tables are created.
Step5: Add the app name in settings.py file
The file called settings.py It holds all the configuration values that your web app needs to work; database settings, logging configuration, where to find static files, API keys if you work with external APIs, and a bunch of other stuff. .
After writing this code. Go to settings.py present in your project folder (Here project_Hello) in that go for the code related to ‘INSTALLED_APPS’ add your app name (Here the app name is DemoApp).
Step6: Import and register the model under admin.py file of your app
from . import model ### to avoid collision of import statements
from .models import bankDetails ###import the model
admin.site.register(bankDetails) ##register the model (class or aka table1)
from .models import bankAccount
admin.site.register(bankAccount) ##register the model (class or aka table1)

CREATING LOGIN PAGE IN DJANGO
In order to create a login page in Django we need to create a folder called template which stores the html pages. Since here we need to create a login page we should be aware of html tags. Django by default will look within a templates folder called registration for auth templates. The login template is called login.html.
Create a new directory called registration and the requisite login.html file within it. Note that project_Hello and template folder should be in the same level.
(MYENV) F:\Django_Demo\project_Hello> mkdir templates
(MYENV) F:\Django_Demo\project_Hello> cd templates
(MYENV) F:\Django_Demo\project_Hello>\templates> mkdir registration
Inside registration folder create login.html file and type the following code
<!– F:/Django_Demo/project_Hello/templates/registration/login.html –>
<h2>Log In</h2>
<form method=“post”>
{% csrf_token %}
{{ form.as_p }}
<button type=“submit”>Log In</button>
</form>
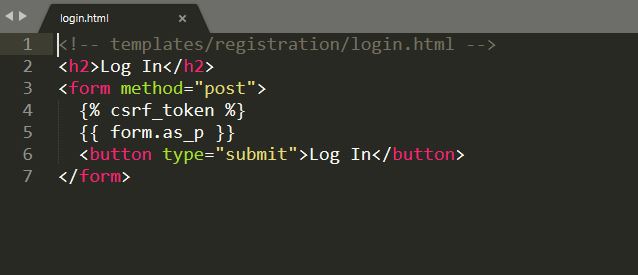
The code typed in login.html is a code for standard Django form using POST to send data and {% csrf_token %} tags for security concerns, namely to prevent a CSRF Attack.
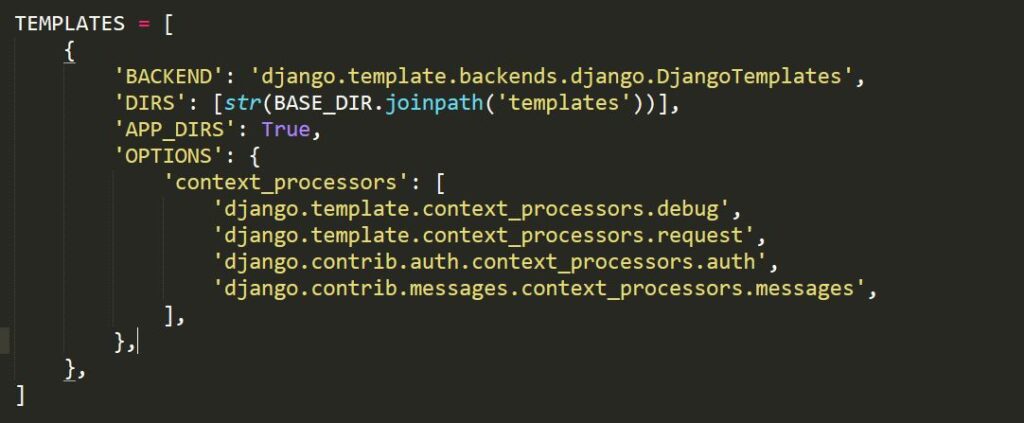
Next update the settings.py file to tell Django to look for a templates folder at the project level. Update the DIRS setting within TEMPLATES as follows. This is a one-line change.
# config/settings.py
TEMPLATES = [ {
…
‘DIRS’: [str(BASE_DIR.joinpath(‘templates’))],
…
},
]
Upon Successful login the page should be directed somewhere. We can direct to any view or page. For the sake of simplicity let us redirect it to homepage where you get the welcome message.
In order to do so you need to just type a single line of code (as given below) at the end of settings.py file.
# settings.py
LOGIN_REDIRECT_URL = ‘/’
Step7: Configure url.py file
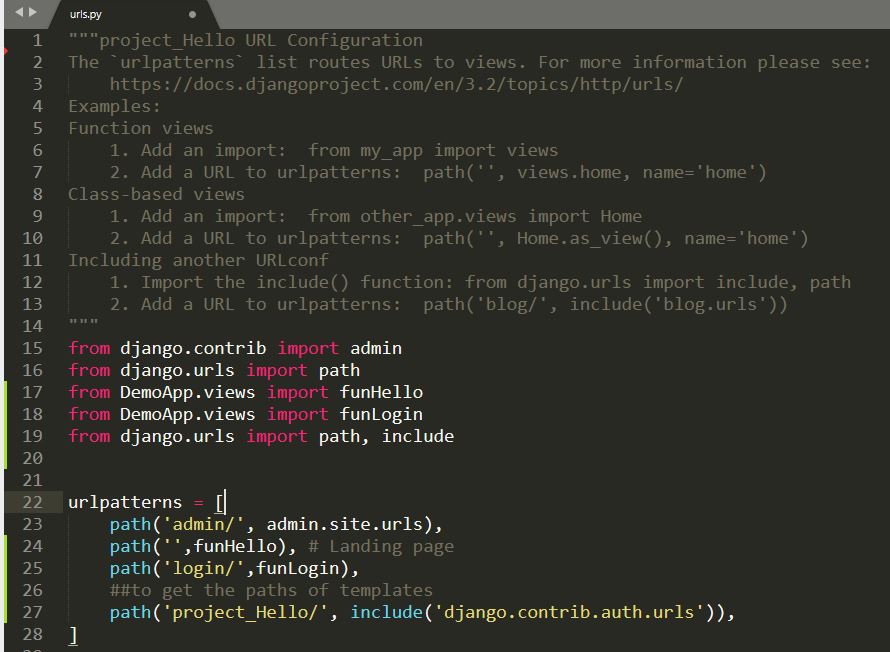
Now once you have created your views, models and forms let us go to urls.py which is present in your project (eg: here project_Hello) and import the views as well as create the path so that it can be accessed from the server.
In urls.py file all views are to be imported.
The view may be either general views created in Django or views created through forms.
from DemoApp.views import funHello
from DemoApp.views import funLogin
from django.urls import path, include
One more major code to be typed is in urls.py file
# urls.py
path(‘project_Hello/’, include(‘django.contrib.auth.urls’)),
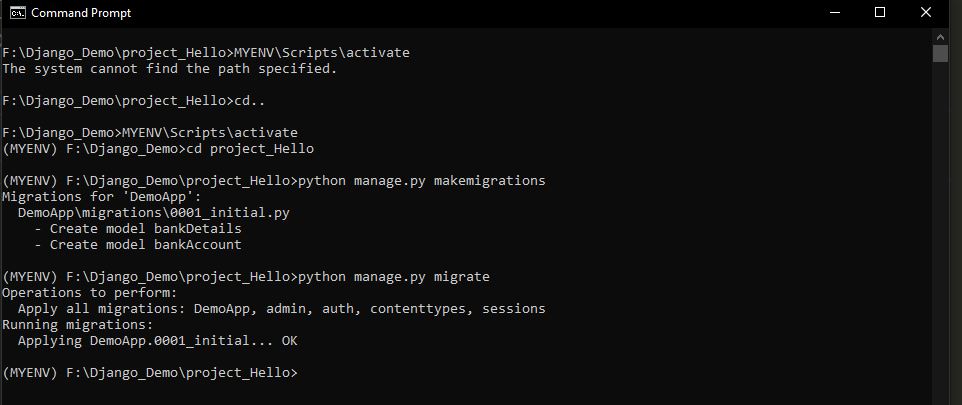
Once the code is written save the file, go to command prompt makemigrations, migrate and run the server and that’s it. Done. Check your result in browser. (Step8 to step10).
Step8: Save all the files
Step9: Go to cmd and type the following:
(MYENV) F:\Django_Demo\project_Hello> python manage.py makemigrations
(MYENV) F:\Django_Demo\project_Hello> python manage.py migrate
(MYENV) F:\Django_Demo\project_Hello> python manage.py runserver
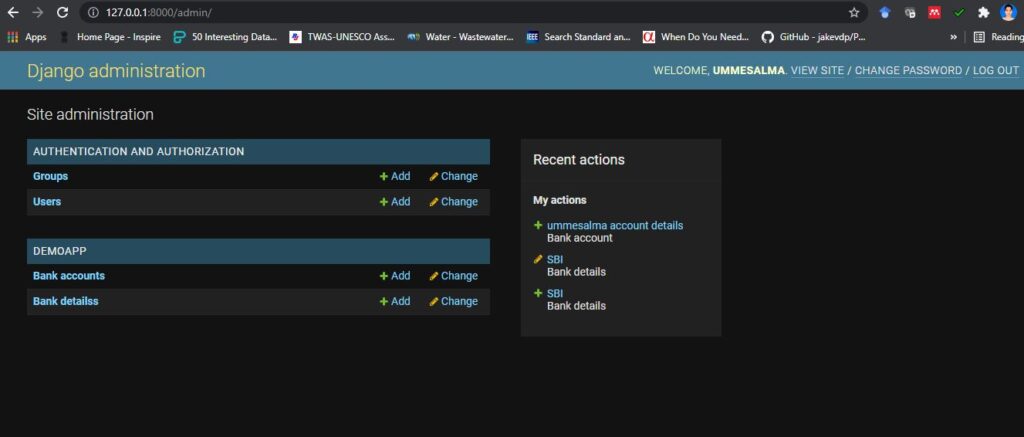
Step10: Start your admin page in web browser
Open any web browser and type 127.0.0.1:8000/admin
And refresh it. Here along with user authentication details you will find two tables (bankDetails and bankAccount) which you created by creating the models. Here you can add as many entries (rows) for bankDetails and bankAccount by entering the values for each attribute. You edit, delete and save aslo.
The same thing can be done using sqlite browser. Where you can alter the table, update or even delete the table.
(MYENV) F:\Django_Demo\project_Hello> python manage.py runserver
That’s it you are done with your login page. To check it run the server by coming
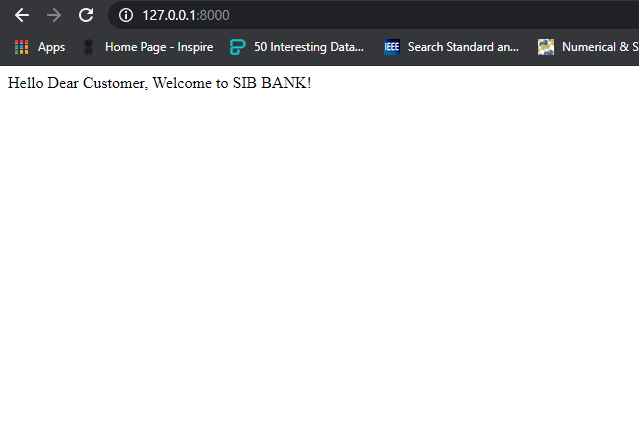
In the browser’s address bar type http://127.0.0.1:8000
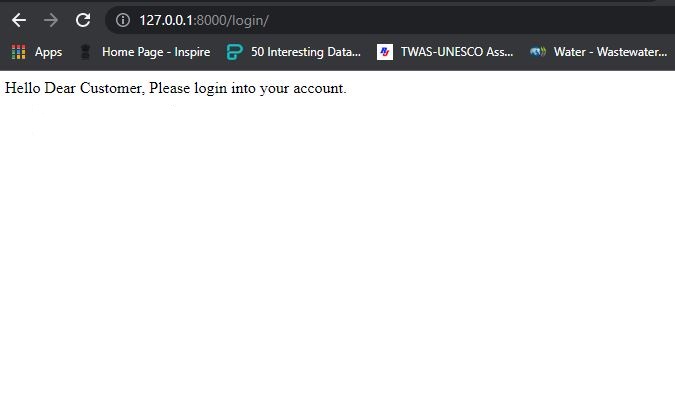
In a new tab of your web browser type http://127.0.0.1:8000/login
Go to the web browser and type http://127.0.0.1:8000/project_Hello/login/
You will get the following screen
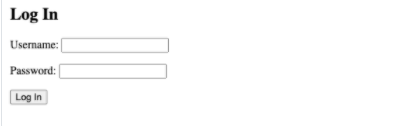
Once you enter the correct username and password you will be redirected to the home page automatically. All thanks to the single line code LOGIN_REDIRECT_URL = ‘/’ written at the end of settings.py file.
Go to the Browser and type http://127.0.0.1:8000/admin/